Google Analytics is an amazing tool for your business—it can process tons of data and tell you just about anything you need to know about your website. It also tells you a lot that you don’t need to know, which can be distracting for business owners who simply need to focus on data relevant to their customer base.
In particular, this can be tricky for local business owners. Sure, it’s great to know how visitors from around the globe are getting to your site, but it’s likely more important to understand what local customers need.
The good news is Google Analytics has a way to filter out exactly what customer data you need. Here’s a quick 4-step guide on how to measure local search traffic in Google Analytics.
1. Create a New Segment
The first thing you need to do is create a new segment—this is how you’ll filter out the users in your area who arrive at your site through a search engine. Most importantly, you’ll be able to use Google Analytics’ reporting features to analyze your filtered segment. Start by clicking “Add Segment,” then “New Segment.”

From there, you’ll see a dashboard like this:

2. Create a Filter for Location
It’s worth noting that you can segment your audience in any way you can imagine with this dashboard. For this local search traffic segment, start with identifying the location you want to focus on. Google allows you to filter by continent, subcontinent, country, region and city. What you choose depends on your marketing goals, but generally it’s best to stick with region or city.
Select “city” from the first dropdown menu, and “is one of” from the second. This will allow you to choose multiple cities if needed.

Once your dropdown menus are selected, start typing in a city. Google will autocomplete cities that are available to use. The options are determined by actual city boundaries, so if you’re looking to include suburbs to a segment, you’ll have to enter them separately. For example, if you want to include the entire Los Angeles area, you’d have to add Los Angeles, East Los Angeles, Hollywood, Beverly Hills, etc. To add more than one city simply hit enter after your first city and start typing the second.
3. Create a Filter for Search Traffic
Once you’ve picked your locations, head over to the “conditions” menu within the New Segment dashboard to create a filter for search traffic.
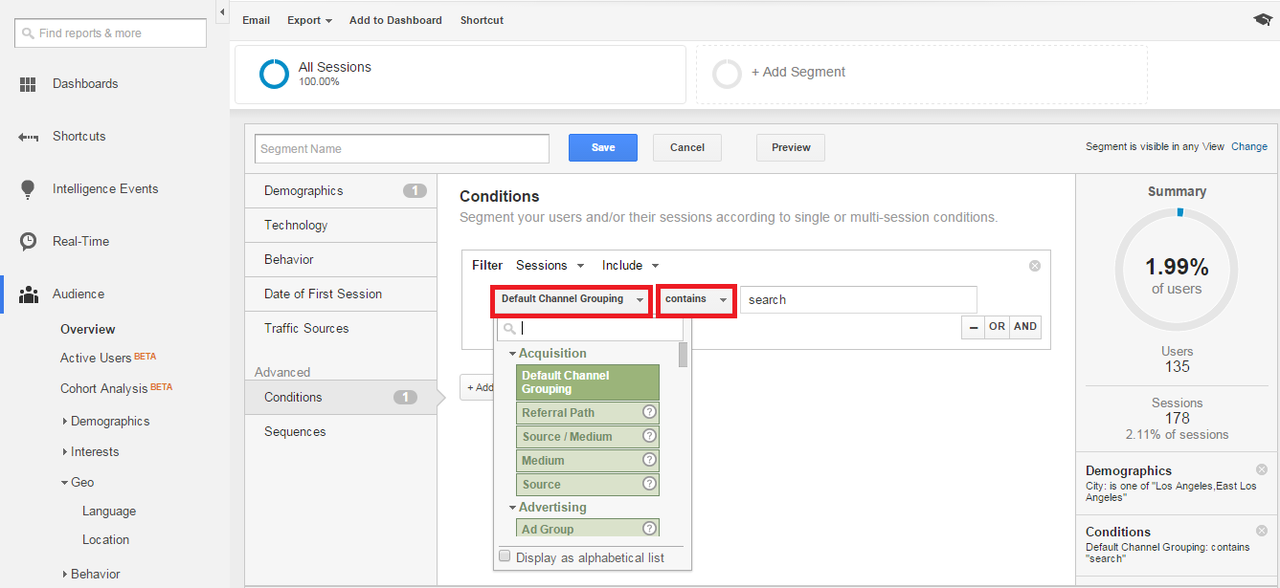
As you can see above, set the first dropdown menu to “Default Channel Grouping,” and the second menu to “contains.” In the text field next to these menus type “search.” Google will prompt you to choose between organic and paid search (if you’re using SEM)—feel free to get more granular by choosing one of the two, or simply leave it as the default “search” to include all search traffic, and you’re good to go.
Give your segment a name, hit “save” and you’re done! Now, whenever you filter by this segment, all reports will only pull data from your specified local search segment. Pretty neat, huh?
4. Compare Cities
You can also compare different segments once you’ve set them up. You can add and compare up to 4 segments at a time, looking something like this:
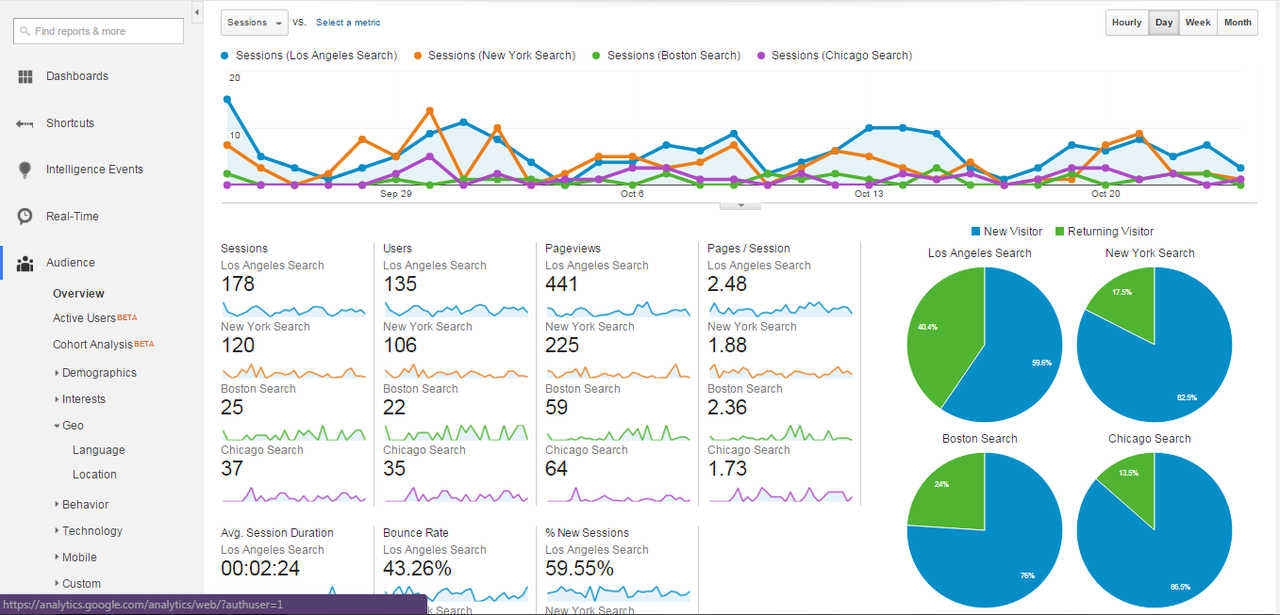
This is effective if you have locations in more than one city and you want to collect and compare data on local search traffic for each one. It’s also helpful if you’re considering opening other locations in certain areas. There’s even a shortcut to create additional similar filters: simply click the dropdown arrow beside a filter, select “copy,” and switch the city, change the name and hit “save.”
Check out more Connectivity resources on Google Analytics, including our webinar on “The Right Ways to Use Analytics for Local Businesses.”
Katelyn Massey is an SEO Specialist for Volume Nine, and a contributor to the Connectivity blog.